
Oh yes, that's what I said, but no, not a hair weave. A new project. I love new projects. I love projects. Period. In October of 2010 I made a costume for my dance performance that involved weaving a lot of polar fleece and other fabrics together to create a really cool skirt that I wore when I performed my silk poi piece. (i dyed my own silks for this too) I don't have video to share or I would. One day when the weather warms or when I get an opportunity to perform it again, I will and then I will share it with you all, but for now, you have to use your imagination. The point is, it inspired me to bring some weaving into my quilts. I've been dreaming of doing this for months now, but as you know, I was trying to be diligent and get Lauren's quilt finished (which only took 3 years) and trying to get other projects finished, trying to get through Christmas and New Years, trying to learn how to do thread painting... So many things... standing in my way... You know the story. But I never stopped thinking about it or the colors or how I was going to use it. Well, I was beyond excited when I finished Za Zen and it made room in my life to get started on THIS!!! (I still have other projects I'm also working on still, but this one is calling out to me the loudest).
I starched the muslin really heavily first. This is the first time I have used starch and I think I will be using it more and more. It has helped so much in keeping the backing fabric from distorting as there are no wrinkles in it and it has kept its shape nicely. It is heavily starched. I also like how stiff it is when I move it around so I don't have to work hard at keeping it flat while weaving.
Then, I measured around the edge to mark 1 inch in (that will be the actual size of the quilt). I also measured from the center to create a loose edge for where the blue would end and the red begin. (Again, sorry there are no pictures, I'm new to sharing the WHOLE process). I knew I would be wanting this to be on point when it is finished so I started on point, not that you can tell in any of the photos, but when all is said and done, you will see...
So, here's how I started out...
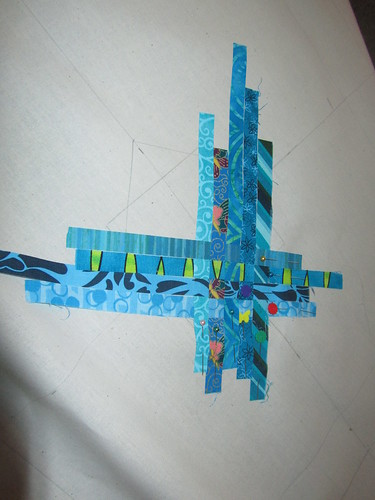
I didn't want all my strips to end at the same time which is why they are staggered and cut different lengths. I wanted it to be as random as possible. I did not iron anything down until I had a really big space done in case things needed to be shifted. I starched the muslin really heavily first. This is the first time I have used starch and I think I will be using it more and more. It has helped so much in keeping the backing fabric from distorting as there are no wrinkles in it and it has kept its shape nicely. It is heavily starched. I also like how stiff it is when I move it around so I don't have to work hard at keeping it flat while weaving.
Then, I measured around the edge to mark 1 inch in (that will be the actual size of the quilt). I also measured from the center to create a loose edge for where the blue would end and the red begin. (Again, sorry there are no pictures, I'm new to sharing the WHOLE process). I knew I would be wanting this to be on point when it is finished so I started on point, not that you can tell in any of the photos, but when all is said and done, you will see...
So, here's how I started out...
When a new strip had to be added I would put it under the strip going across it so where two strips meet can't be seen.
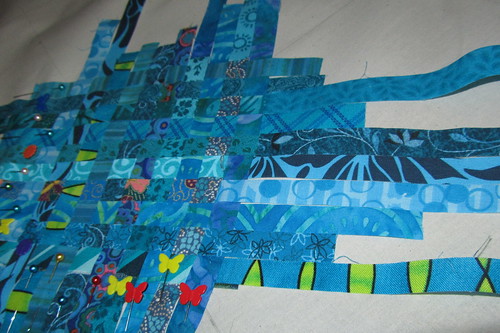
Here I have started ironing and realized I only needed a few pins from time to time.
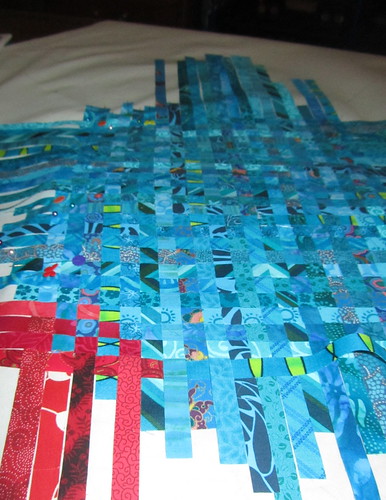
When the blue started getting near or over the line I had marked for red I started adding the strips of red. (This is when I started getting super excited about it! I love these colors together.)
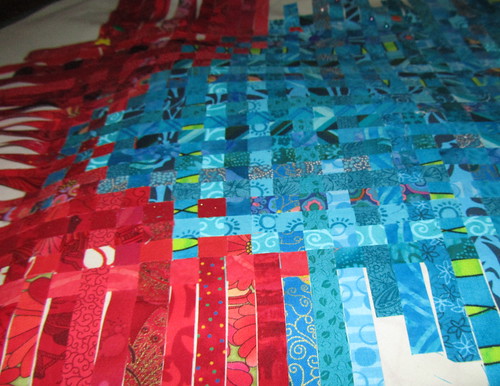
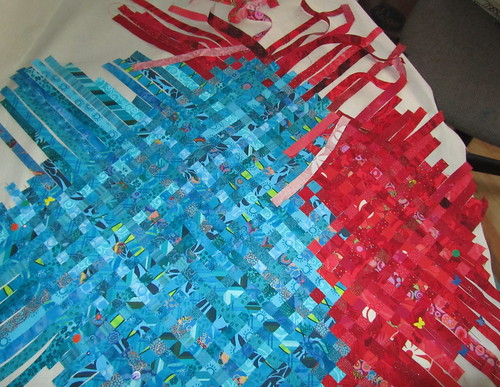
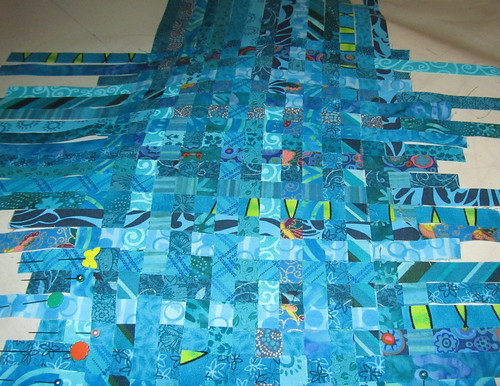
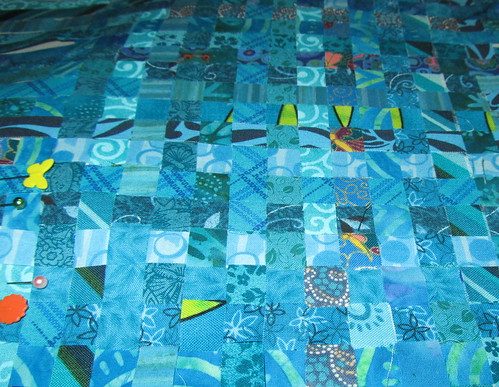
This was my stopping point.
The weaving will be the background when all is said and done, but I am definitely going to be using this in many other projects. Later in the week I will get the photos of it finished up. Let me know what you think.
This is amazing!! And I love reading about the process. Thanks for sharing your gifts with us!
ReplyDelete