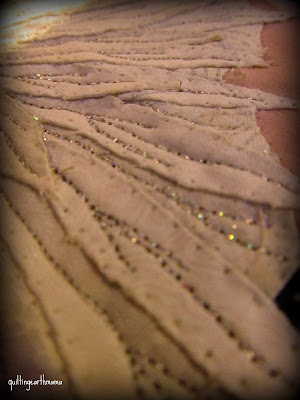
After the tedious work of getting the swan and ballerina sewn down came the delicate work of thread painting.
I love metallic thread.
Well, what I mean to say is I love the way metallic thread looks on a quilt. It's all sparkly, and well, I love all things sparkly.
However... I have not enjoyed using metallic thread in the past. It has always been a love/hate thing when using it. For me, the outcome is always worth the hassle (I keep on using it), but the process brings out the worst in me. It constantly breaks. You get a few stitches made and snap, it breaks and vulgarities explode out of my mouth.
NOT THIS TIME!
Metallic thread, I've got your number now!
Metallic thread, I've got your number now!
After taking the thread painting class a few months ago, I have found a new love of metallic thread. We didn't do any stitching with metallic thread in that class - though we were supposed to get to it. Time ran out, but we did talk about it.
In that class, I learned some things to make it easier to use metallic thread and was reminded of some steps I had forgotten.
The outcome?
Minimal cursing (my kids were thrilled), minimal frustration and successful metallic thread painting.
So, for you quilters out there, here is what I did this time that worked for me and what I will be doing from now on when using metallic thread.
The very first thing I did was to change the needle in my machine to a metallic needle. My machine prefers Schmetz needles and so do I. They are the ONLY needles I use. In case you don't know why a metallic needle - the eye is a bit larger than a regular sewing needle and it has a special coating to help the thread ease through the eye. The thread doesn't have to work so hard to get through the little eye and it helps reduce the thread stretching which ultimately is what leads to it breaking.
Secondly, I used a 60 weight thread in my bobbin case. I like bottom line made by superior.
When loading my machine with the metallic thread I dropped it into a coffee cup behind my machine once it was threaded and the key to this for my machine is to have the spool unwind with the thread unwinding over the spool rather than under the spool. So, the thread spins counter clockwise verses clockwise. For my machine this seems to take some tension off the thread and the less tension on it the better. Something else I noticed about making sure it came from the top of the spool was that the spool never jumped or jerked which can also cause the thread to stretch and break. It never got too tight. (Hopefully, it makes sense to you.) This one little detail made all the difference for me this time. It took a few tries, but once I took the time to figure it out my thread didn't break anymore and I was able to just sew - with metallic thread - That has NEVER happened for me before.
Lastly, I set the speed on my machine to pretty slow. Not the slowest setting, but just above it. Some machines don't have this as an option, so if yours doesn't then you need to practice your machine quilting a lot so that you can control the speed yourself easily. I have never used this feature on my machine before, but I will be using it from now on. By setting the speed, I was able to sew the same speed no matter how hard I was pushing on the presser foot. Again, this just helps keep a steady amount of tension on the thread helping to reduce the amount of stretching and ultimately less thread breakage.
I also noticed sewing at a slower speed my stitches are more even because I had more control.
Now I can just enjoy using metallic thread and hopefully, you can too, without all the vulgarities.
Now I can just enjoy using metallic thread and hopefully, you can too, without all the vulgarities.
Until tomorrow!
I'm off to quilt!


Great tips Sarah. I cant wait to need metallic thread so that I can use these ideas!!!
ReplyDeleteLove how the quilt is coming, especially the wings and skirt!!!
I have found great ideas for your blog. It's really a source of inspiration. I congratulate you and send my greatest congratulations. It's a real pleasure to read you
ReplyDeleteFantastic work full of creativity. Congratulations. Continue your path!
ReplyDelete