Showing posts with label art quilts. Show all posts

Sunday, February 9, 2014

blank canvas

This blank canvas has been taunting me for weeks now - begging me to break out some fabric, some stencils, make some patterns and get stitching - yet an image has been alluding me. Without an image in mind one can only get so far... Sometimes when life is too busy or I am feeling too much stress a blank canvas mocks me.  When an image hides in my mind and won't come out it is often a sign that life is out of balance.  The blank canvas calls to me to slow down and take time for myself - it asks me what am I hiding from?  My mind stays clearer when creativity  is at the center of everything I do.  Like the time I spend at my sit spot time spent behind my sewing machine is time with myself - a time where I can get into the shadows of life and tend to the dust that is trying to settle there.  Shadows can only be ignored for so long... Keeping my mind tidy leads to life flowing more effortlessly and I am all about that.

Thankfully, this blank canvas will not be mocking me for too much longer.  Imagery popped into my mind last night as I was drifting off to sleep.  This in between time of awake and asleep is often my richest creativity time.  Stories become visible and images become clear.  I spent the day getting my stencils ready and now it's time to pick out fabric!

Until next time-
S

Saturday, January 25, 2014

dive deep


In a revival of creativity and self reflection I am back to blogging.  I was trying out a different interface through my website, but have decided I don't really like it. So, here I am back to this blog in hopes of feeling inspiration to write as much as I can...

This quilt is all about the process of diving deep into ones self.  There is so much I can say on this process both from personal experience and having witnessed people looking at their own personal stories and seeing how attachment to what was can keep us from moving forward in life.

I am forever grateful to know how to look deep and look hard at the patterns and wounds within the essence of myself that I want to transform into new healthier patterns and releasing those wounds, tending the scars and allowing new stories from within to evolve.

Through the process of "diving deep" my life gets better.  I find more joy.  I find more connection to self and to those around me. In my mind, this can only be a good thing!

Here's to more soul searching and more joy and more happiness!

Until next time-
S

Friday, March 9, 2012

Finished the tree

Sometimes I just can't believe how fast time goes.  

Kalib and I had an amazing time at the Advanced Bird Language weekend up at Wooten Woods.  We met some awesome people, learned more about tracking, and best of all learned more about birds.  It has blown my mind to learn all this new information about birds and what they can tell us about our world.  Those vocal critters are pouring the information out.  We just have to tune in.  

In the mean time, I haven't gotten a lot of quilting done.  Artistic progress is slow, but any progress is good progress.

With all this mentor training and bird language training much of my time is taken up studying and looking things up and... listening...

I did manage to finish the tree!


However, when I stood back from it I just did not like that apple in the middle of the tree.  

 A little obsessive you ask?
Maybe. 
 I just like to get it right.  (That's my story and I'm sticking to it!)


Initially, I wanted it to stand out because it would sit at the heart of the tree, but each time I looked at it I felt like it drew the eye from the overall image a little TOO much. And, I just don't really like that piece of fabric.  I keep trying to use it and keep putting it back on the shelf.  One day it will make its way into one of my "tapestries."

So, I pulled it off and replaced it with a different apple in a fabric that was only slightly different from the others.


AHHHHH.... much better...

Now, I can sleep at night!


Until next time!

Sarah

Monday, February 20, 2012

Leaves made with scraps? I think, yes!

I've started adding leaves.  Everything is fused thus far with wonder under.  

If you notice in the picture below the template is lifted back.  I have pinned it to the quilt and I am lifting it when I iron a leaf or apple down, but using it to help me get the leaves in the right place.  The template is on stencil paper I picked up from the local art supply store.  It comes on a roll and is quite larger than stencil paper that comes in drawing or sketching books. Because it is bigger I find myself taping sections together less often. (For me, this is a big time saver and makes working with the pattern much easier.)  I will try to take a picture of this next time I have to tape sections together.


 Here's a slightly closer image.


 and even closer.  You can see here pretty clearly that I'm using lots of different prints. 


Fabric is expensive, and since money is a finite resource in our home right now, I have challenged myself a while ago to use what I have in my stash and only buy fabric when I REALLY need it.  That's a bit of loaded challenge since we quilters seem to ALWAYS need more fabric.  I have a wonderful stash that is beginning to show the signs of me not replacing fabric as often, but it is totally fun to see how far I can stretch a piece of fabric and how little I actually end up wasting - which is next to none. The biggest perk of all is learning how I end up not needing fabric as often as I think I do!

  Now, I save all my scraps and put them in color coordinated baggies.  These are even beginning to emerge into shades as I collect scraps. When I'm needing smaller pieces I just pull out the baggy with the color I need and viola... this time, I had enough green to do the leaves in a slightly darker shade than the grass!  If the scrap is under 10" X 10" (or there about) then it goes into the baggy and I save scraps down to 1" X 1".  I use a lot of small pieces of fabric in my work, so it's fun to sift through these little bags and pull from it.  All the leaves have come from this small stash with the exception of two of the prints.  There are 9 different fabrics all total.

Until next time!
Sarah

Thursday, February 9, 2012

Some grass and flowers

If you follow me on Facebook, then you have already seen these, but I've added grass and I've added some flowers and then there will be a tree and yes, another woman (i do love women archetypes) added on before I add more grass and more flowers.

  I'm working on trying to create more depth in my pieces. 


And after I've added a few flowers...


Until next time!
Sarah

Wednesday, August 10, 2011

Hanging the show

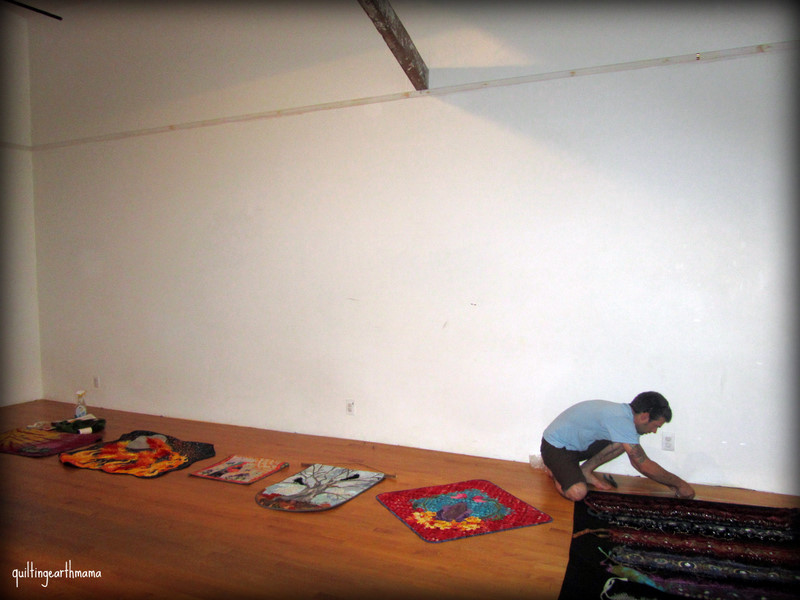
As promised, here are some photos from the day we put the show up at FloorSpace.  India took most of the photos (except the one she is in) while Jason and I got the show up.  Jason did most of the really hard work of climbing the ladder and hooking the wire while I adjusted and straightened.  I am always shocked when we hang up art work by how long it takes to get it all right and even on the walls.  It took about 3 hours and one trip to the store for more wire.


 I laid all the quilts out like I wanted them to hang on the wall while Jason got the wires ready on the rods.


 India did the same.
 We were eager to see how India's pictures would look on the wall and get an idea of the spacing so we hung one of India's photos up.  Looks pretty good doesn't it!
 Can't just hang out on that fantastic dance floor without a little dancing while mom and dad work!

 Quilts are up and now the job of getting the photos up!

 Wiping them down one last time to make sure there are no smudges on the glass.
 The last time to walk through and straighten.
 viola!  All done!  Looks great!


See you tomorrow!

Thursday, August 4, 2011

Beads, Roving, feathers, oh my!

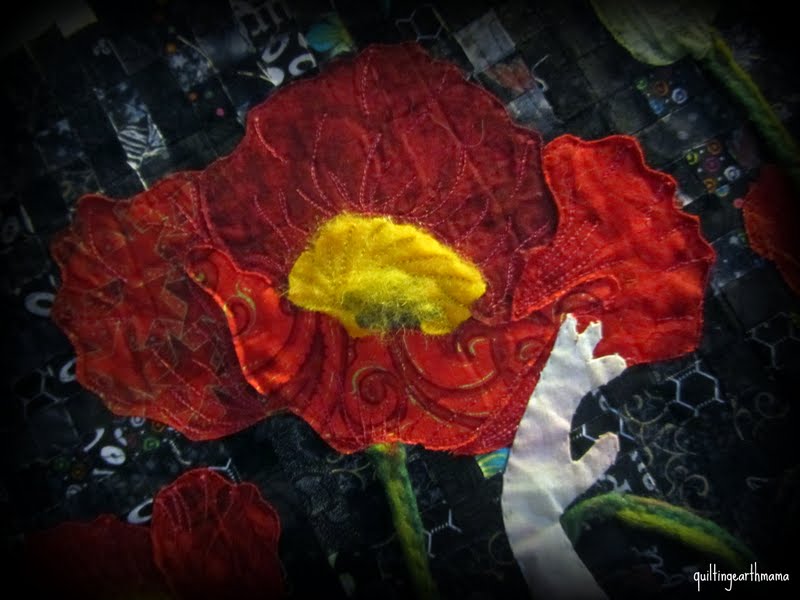
 When I got the poppies finished, I already knew I was going to sew down some wool roving over the yellow to give a look of pollen when you are standing back from them.  I also knew I was going to sew beads for the seed heads.  

The embellishment stage is often my favorite time with a quilt.  I get to hold it and cradle it and spend some time touching it in a different way than I do when it is going back and forth from the design wall to the sewing machine.  I'm sitting here trying to figure out how to explain it, but I really don't know how.  It's all a tactile thing.  Maybe the quilters who read will understand.


I sewed the roving down on the sewing machine, then I got out all my black bugle beads.  I ordered these specifically for this project.  (Ornamentea also has great prices on wool roving.)  I put everything out in front of me and one at a time I sewed down the beads over the centers of the poppies.


I also ordered these crystal looking beads thinking I would do something completely different than I ended up with for the ballerina.  I never loved her head piece, but in studying ballerina's it was appropriate - more appropriate than her having long flowing hair and the idea giving her a bun was just yuck so, I figured I would dress it up when I got to the stage of handwork and embellishing.  

A while ago, right after the beach, someone gifted me some swan feathers from a lake where they were found - it was on the property of a camp where the swan had lived a good life and died leaving behind some feathers.  I felt honored to have them since I have been working with the swan.  When they were given to me I thought for sure I would find a way to incorporate them into the quilt, but they are HUGE and didn't fit. Even though they were too big they still inspired me to use some feathers anyhow.  

I ended up just using some feathers I had from a project the kids and I have did a year or more ago.  A good quilter holds onto everything that might be useful in a craft, right?  Certainly paid off this time!


I'm all done with the top.  It feels a bit bittersweet.  I better get busy on those new ideas I've got floating around in my head!

Until tomorrow!

I'm off to quilt!

Monday, August 1, 2011

Oh Sweet Trillium... I how I love thee.

After getting the lady's slipper finished (or what I thought as finished) I decided to make some trilliums for the bottom of the piece.  There was a lot of negative space at the bottom.  To me, it just felt like it needed more.

While making the trilliums I realized the lady's slipper was still not quite right, so I made the leaves a more muted green to make them blend in a little better. 
Before:


After:


Better?

Onto the the trilliums...


When I was in college studying horticulture was the first time I had the pleasure of seeing a trillium.  They are small and inconspicuous and as with all flowers that I truly love - one has to be paying close attention to see them.  For some reason, the simple almost hidden flowers are my favorite, but I've told you all this before.


The trillium in the woods, much like the maypops and blood root or wood sorrel remind me of a world of life we can't imagine going on in the woods, or the floor of the earth.  I think of fairies and magic, pixie dust and glitter.  I have stories upon stories built around the life of these sweet little plants.  


Trillium were the first "woods" flowers I came to know and they will always have a special place in my heart for opening my eyes to the world of flowers that bloom only a few inches above the soil.  

Some trilliums can be rather large, but you have to get to slightly cooler climates than ours to enjoy them.  When we were at Joyce Kilmer I saw some of the biggest trilliums I have ever seen.  They were fantastic like all the life around them they grew big.  Maybe that's the land of the gentle giants... much like the sequoahs - that's the story I made up for myself anyhow.


I recently read in The Maiden King something along the lines of the reason we connect to fairy tales is because the story is full of all this fantasy that excites us and we can't imagine it, but the feelings behind the action speak to our very core.    Fairy tales are ageless and we hear them over and over and we experience the same feelings each time we hear them as though we have never heard them before.  We relearn the lessons until they stick with us, then we need a new story with new lessons to hold onto.


I believe this and think it is why I am as drawn to archetypes, folk lores, and mythology as much as I am.  There is much to be learned from those who have come before us and how they related to their world through story - something we have gotten away from.

The trilliums have added the last element of the fantasy of the moment these two beings are sharing.  It has become unimaginable to me, yet the lesson of the beauty of transformation is one I will continue to learn.

They are now between the worlds of the red poppies and the simple trilliums sharing a moment in time.  Looking at them I find myself asking what brought them to this moment?  Why are they bowing to one another or are they bowing to the lady slipper?  I start making up a story of characters and magic and laughter.  The story deepens in my imagination and I find joy in telling this story whatever it is.


Until tomorrow!

I'm off to quilt!


Thursday, July 28, 2011

A day spent with a lady's slipper...

There seems to be a point in every quilt that I reach that brings me to a stuck place.  That eternal hump I just can't get over.  

When I started this quilt I thought for sure the center point between the ballerina and the swan would be a pomegranate, but as it turned out, when I cut the pomegranate out it just did not fit at all.

I never actually made it with fabric, but I did get to the stencil and when I put that on there it just didn't look right.  It needed to be something delicate and soft, something fragile.

What to do? 

This was how I spent my day...

I started thinking it might cool if it was a wild flower...

Went down my list of favorites that might fit.

Lily of the valley?  They are white and delicate small flowers, but the white would be just too much white.  

Solomon's seal? Too complicated.

Trillium?  maybe....

Lady's slipper?  Definitely yes.

EEEKKKK what color?  

We usually see pink one's around here.    It can NOT be pink.  Major clash with the red.  


But, no harm in trying it, right?


Stare at it.

LOVE it, but hate the color.

What am I going to do? I'm totally attached to the lady slipper.

Google them again... 

There are yellow lady's slipper.

Now, that could work...


Remake the flower in yellow.

Stare at it.  

Absolutely cannot stand the leaves.

Re-make the whole thing with different leaves and slightly different flower- same yellow.

Stare at it - get a little frustrated.  It's still not right.

Think the flower is too big - it's distracting.


Re-make flower.

Stare at it some more (as though I haven't stared at it enough already.)


 FINALLY... got it.

Except, the flower is a little too big.

So, I re-made it - a little smaller...

And viola, SUCCESS!


Whew - that was a close one.  I was beginning to think I was going to have to go with a different flower.

Now, I'm on to those trilliums.  I think I can make those work too...

See you tomorrow!

Wednesday, July 27, 2011

The Face

There was a time when I was afraid to put faces on the people in my quilts.  The human face has a lot to say in the expressions it puts into the world.

Faces are unique to each of us.  Even identical twins don't share exactly the same face.


Wrinkles tell the story of a person's life, the twinkle in the eye expresses joy or lack of it.  The direction of the lines around the eyes can tell you a lot about how much a person smiles.

The way a person's skin stretches in any moment reveals much of what they are thinking in that moment.  Even little twitches of the mouth and nose, or the speed at which one blinks can tell us something.  

We don't hide our emotions as well on our faces as we think we do.

All of this has been running through my head over the years.  How would I ever be able to truly express what the imagery is thinking in my quilts?  
 
Well, I still don't have a solid idea of that yet, but I am learning to experiment with thread and finding more confidence each time I work up the nerve to put one on.

I'm off to quilt!

Enjoy your day!

Thursday, July 21, 2011

Metallic thread, I've got your number now!

After the tedious work of getting the swan and ballerina sewn down came the delicate work of thread painting.


I love metallic thread.

Well, what I mean to say is I love the way metallic thread looks on a quilt.  It's all sparkly, and well, I love all things sparkly.


However... I have not enjoyed using metallic thread in the past. It has always been a love/hate thing when using it.  For me, the outcome is always worth the hassle (I keep on using it), but the process brings out the worst in me. It constantly breaks.  You get a few stitches made and snap, it breaks and vulgarities explode out of my mouth.

NOT THIS TIME!

Metallic thread, I've got your number now!


After taking the thread painting class a few months ago, I have found a new love of metallic thread.  We didn't do any stitching with metallic thread in that class - though we were supposed to get to it.  Time ran out, but we did talk about it. 

In that class, I learned some things to make it easier to use metallic thread and was reminded of some steps I had forgotten.

The outcome?

Minimal cursing (my kids were thrilled), minimal frustration and successful metallic thread painting.


So, for you quilters out there, here is what I did this time that worked for me and what I will be doing from now on when using metallic thread.

The very first thing I did was to change the needle in my machine to a metallic needle.  My machine prefers Schmetz needles and so do I.  They are the ONLY needles I use.  In case you don't know why a metallic needle - the eye is a bit larger than a regular sewing needle and it has a special coating to help the thread ease through the eye.   The thread doesn't have to work so hard to get through the little eye and it helps reduce the thread stretching which ultimately is what leads to it breaking.


Secondly, I used a 60 weight thread in my bobbin case.  I like bottom line made by superior

When loading my machine with the metallic thread I dropped it into a coffee cup behind my machine once it was threaded and the key to this for my machine is to have the spool unwind with the thread unwinding over the spool rather than under the spool.  So, the thread spins counter clockwise verses clockwise.  For my machine this seems to take some tension off the thread and the less tension on it the better.  Something else I noticed about making sure it came from the top of the spool was that the spool never jumped or jerked which can also cause the thread to stretch and break.  It never got too tight.  (Hopefully, it makes sense to you.)  This one little detail made all the difference for me this time.  It took a few tries, but once I took the time to figure it out my thread didn't break anymore and I was able to just sew - with metallic thread - That has NEVER happened for me before.


Lastly, I set the speed on my machine to pretty slow.  Not the slowest setting, but just above it.  Some machines don't have this as an option, so if yours doesn't then you need to practice your machine quilting a lot so that you  can control the speed yourself easily.  I have never used this feature on my machine before, but I will be using it from now on.   By setting the speed, I was able to sew the same speed no matter how hard I was pushing on the presser foot.  Again, this just helps keep a steady amount of tension on the thread helping to reduce the amount of stretching and ultimately less thread breakage.


I also noticed sewing at a slower speed my stitches are more even because I had more control.

Now I can just enjoy using metallic thread and hopefully, you can too, without all the vulgarities.

Until tomorrow!

I'm off to quilt!